Microbit plant moisture detector tutorial
In this tutorial we will be learning how to make a moisture detector, which can be used to detect when plants need watering. We will be using some cheap and easy to assemble components for this great little project!
Ingredients
![IMG_20160706_153146[1]](https://learnlearn.uk/microbit/wp-content/uploads/sites/2/2016/07/IMG_20160706_1531461.jpg)
You are going to need:
- 1 Microbit + USB Cable (for coding)
- 1 Microbit battery pack
- 4 Crocodile clips and cables
- 1 10,000 Ohm variable resistor
- 1 Plant pot with soil.
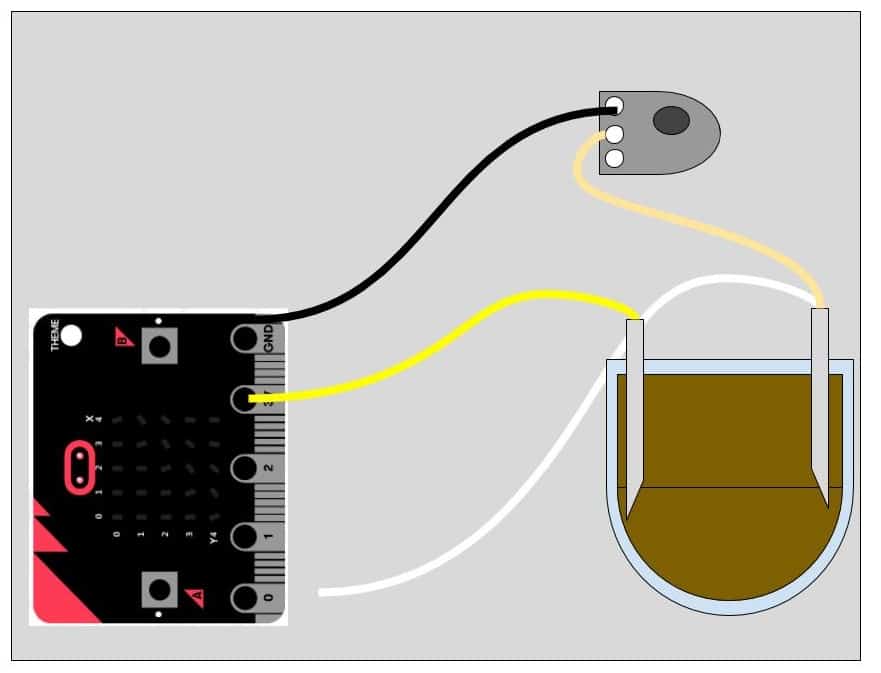
Wire up the Microbit plant moisture detector
Wiring up the Moisture detector is easy! Just wire up your project as below. If you don’t have an organic plant pot like mine you might want to clip your crocodile clips to a couple of nails or metal pegs. Choosing the correct setting on the variable will take a bit of trial and error, but just test it out until the test code triggers at the correct moisture level.
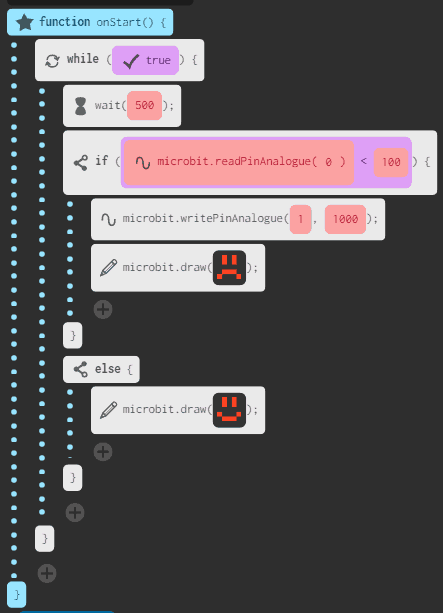
Here is the complete code you will need in order to code your Microbit Moisture level detector. This version of the project checks the moisture level and is great for making sure that your project if working correctly. If you are going to use your moisture level detector connected to a battery pack then it would be a good idea to check this value to something like 360000 (1 hour) so that you increase the Micro-bit’s battery life!
- Adapt your code so that the Microbit only checks every 30 minutes instead of every half a second.
- Add a manual code check function so that if the user presses A it immediately checks the moisture level.
- Add a buzzer/speaker to your setup so that the user is alerted when the moisture level is too low.