Microbit mini radio controlled car tutorial
The aim of this tutorial is to show you how to create a mini radio controlled car using two Microbits and 2 servos. Using two servos instead of a robot car kit and motor-boards means that you can create a smaller and cheaper radio controlled car!
You will need:
- 2 Microbits
- 2 Battery Packs with batteries
- 1 USB Cable
- 2 Continuous servos
- 2 wheels
- 1 Bulldog clip
- Glue gun ( or pva/super glue)
- Soldering iron or 4 Crocodile clips
![IMG_20160704_135151[1]](https://learnlearn.uk/microbit/wp-content/uploads/sites/2/2016/07/IMG_20160704_1351511-e1467639347376.jpg)
The steps to make the car are as follows:
Step 1
Glue the servos to the base using a glue gun.
Step 2
Glue / Blue tack on the Bulldog clip on to the base for the wheel
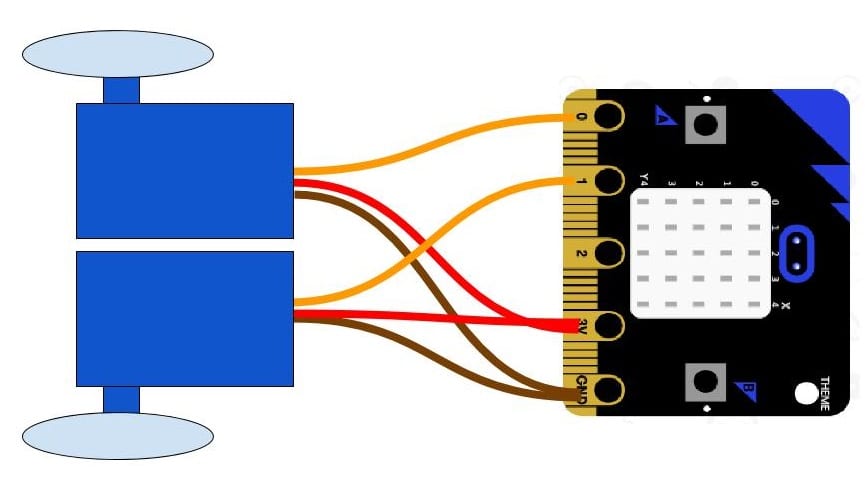
Step 3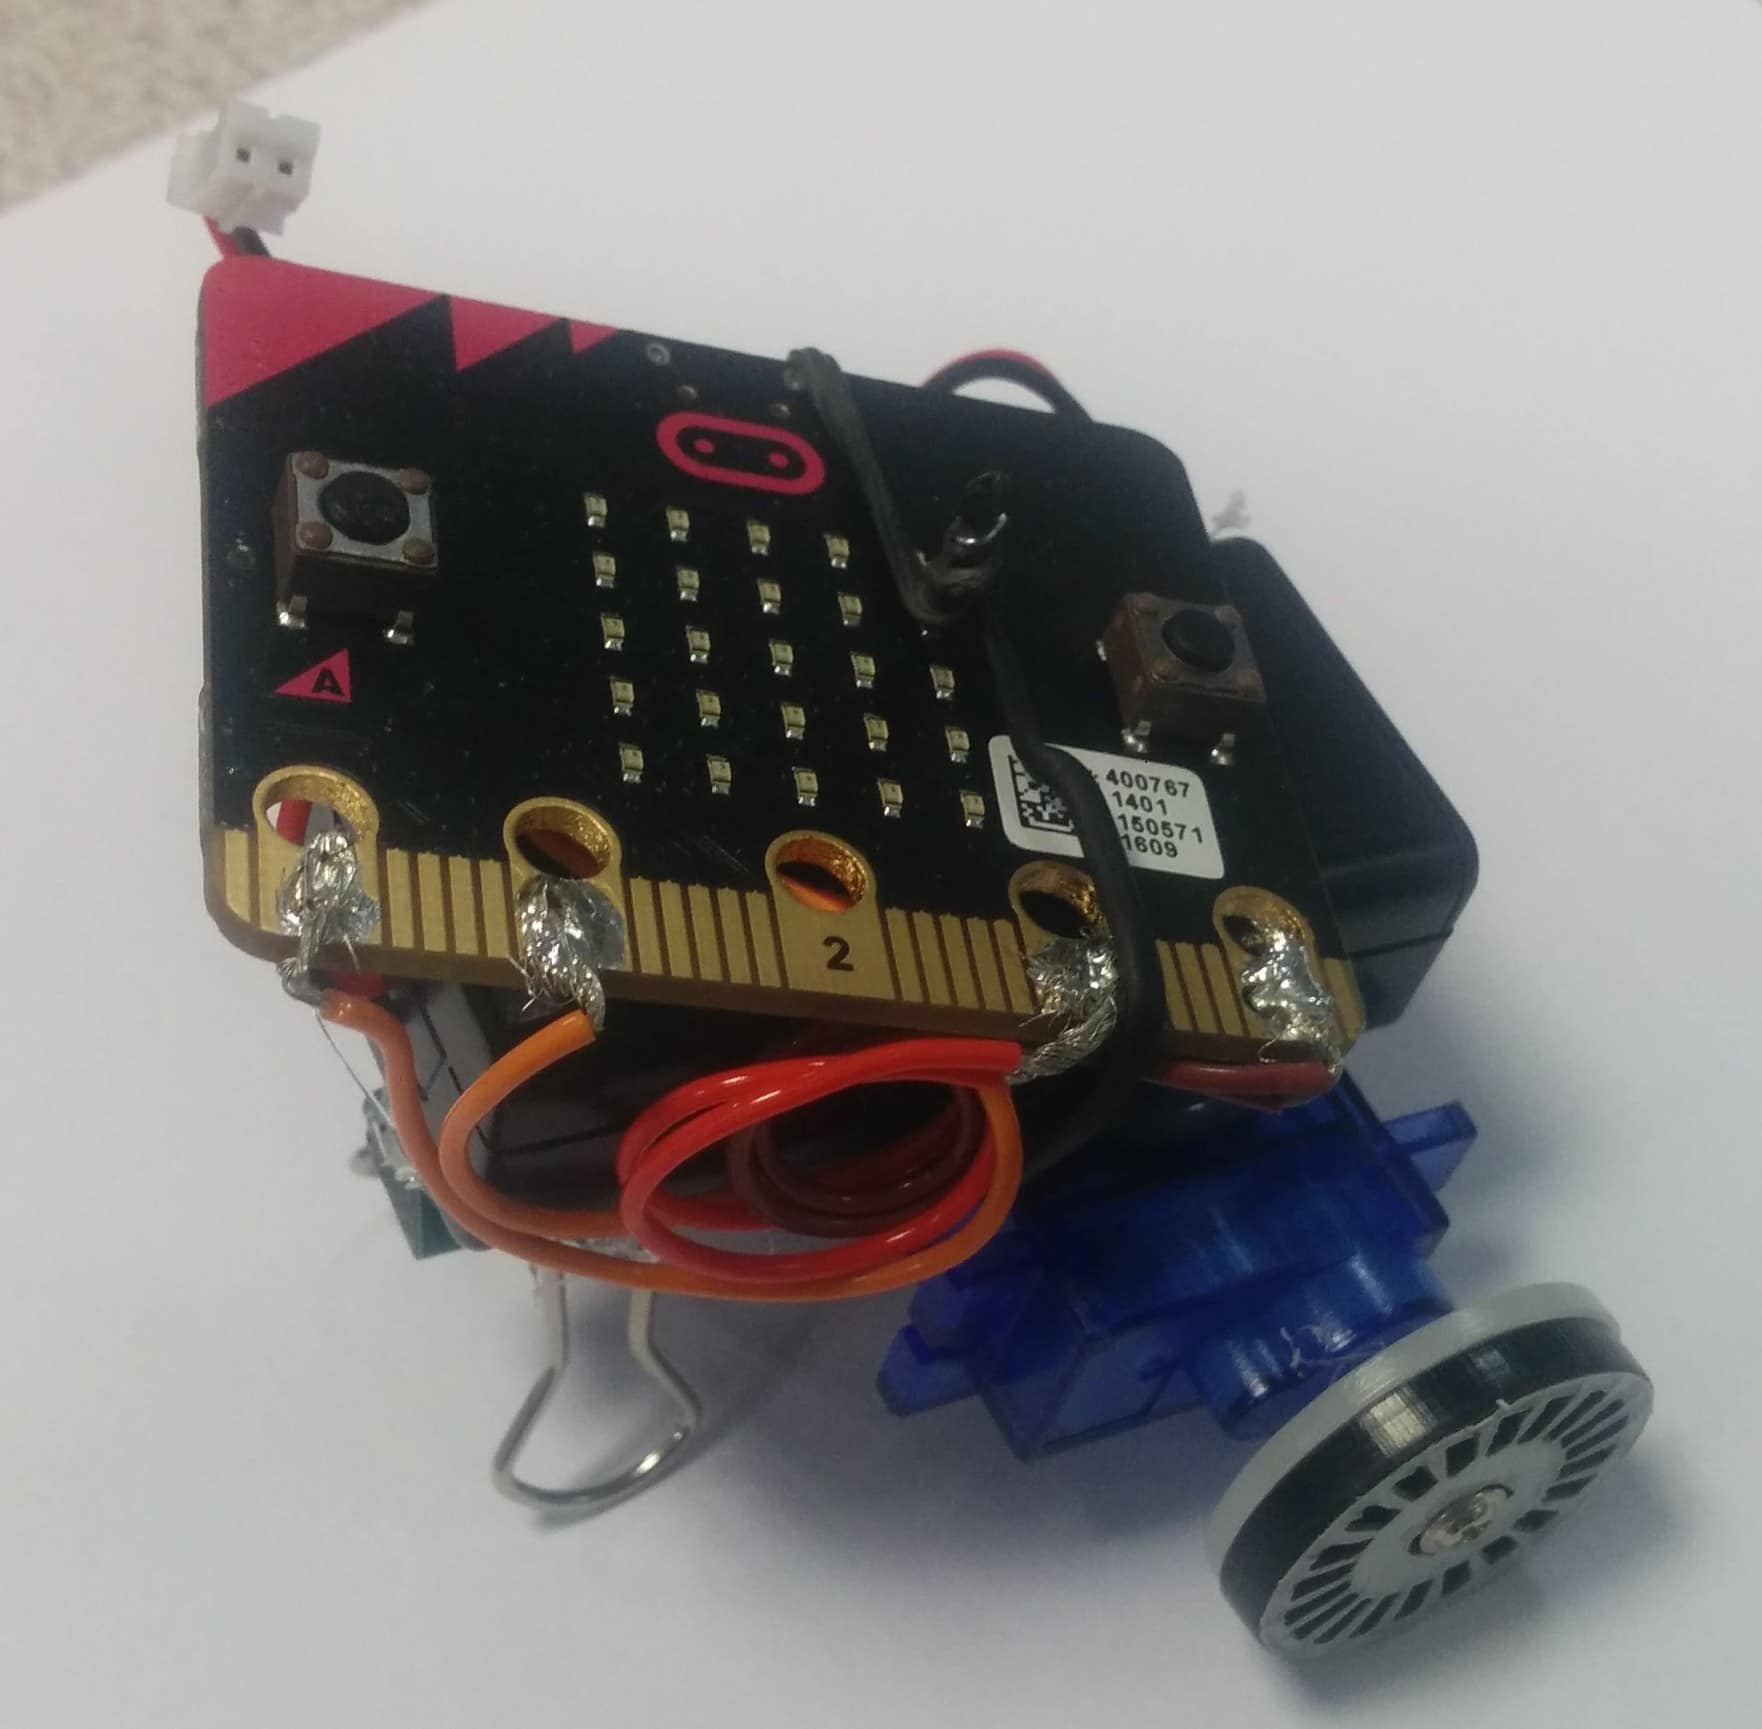
Solder / Crocodile clip the wires to the microbit.
Step 4
Tidy up the wiring!
Microbit mini radio controlled car – Sender Code
For this tutorial we can’t use CodeKingdoms because it doesn’t support Bluetooth radio direct. We need to use this site:
Codethemicrobit.com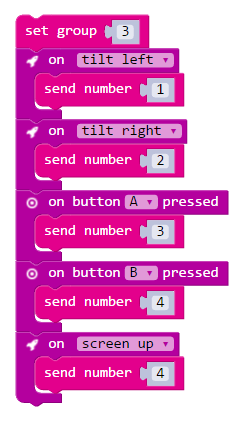
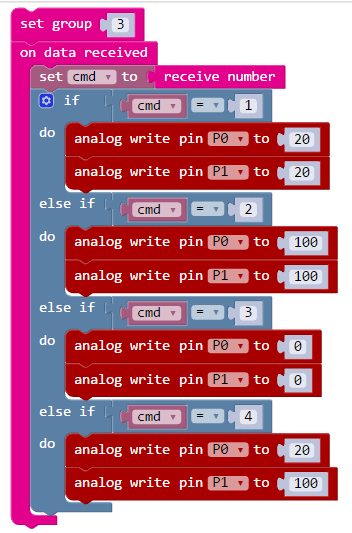
Microbit mini radio controlled car – Receiver Code
Once we have finished coding the sender unit, we need to code the receiver unit to listen for the instructions sent on group(channel) 3. When it receives an instruction it can then output to the relevant pin.
For full details on how servos work, take a look at this page.
- Improve the controls so that the car angle of turn is analogue, not digital
- Add a speed setting
- On car stop / start .