How microphones work
Analog Vs Digital
What is sound?
Sound is vibrations that travel though a medium (usually air) from one point to another, caused by rapid changes pressure within that medium.
When we shout, our vocal cords vibrate rapidly, causing the pressure in the air surrounding them to increase and decrease, producing a pressure(aka sound) wave. This wave travels though the air.
All sound waves have 2 components – volume and pitch.
Volume ( amplitude)
When we shout louder, what we are really doing in increasing the amplitude of the wave that is produced.
Pitch (Frequency)
When we talk in a high pitch voice, what we are really doing is vibrating our vocal chords more rapidly, causing the frequency of the waves to increase.
Wave simulatorThis means that in order for a computer to be able to store ( and play back ) sound, we need to be able to convert these sound waves in to a format the can represent both the volume(amplitude) and pitch(frequency) of the sound being recorded.
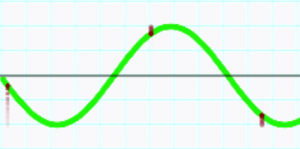
High Amplitude Wave
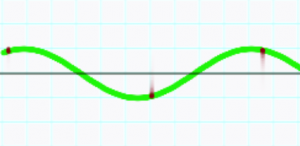
Low Amplitude Wave
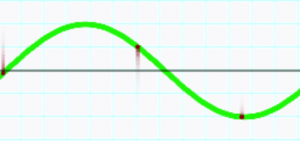
Low Frequency Wave
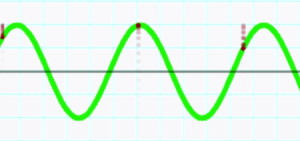
High Frequency Wave
Recording Sound
How is sound recorded?
When capturing sound, we need to be able to plot the both the amplitude and frequency of the sound for each point in it time the recording. This can being easily achieved if we simply measure the amplitude of the wave at a set interval of time. The time interval we choose is known as the sampling rate. We can then use this recorded data to plot against a graph, as seen on the previous page.
For this we need a microphone and a sound card.
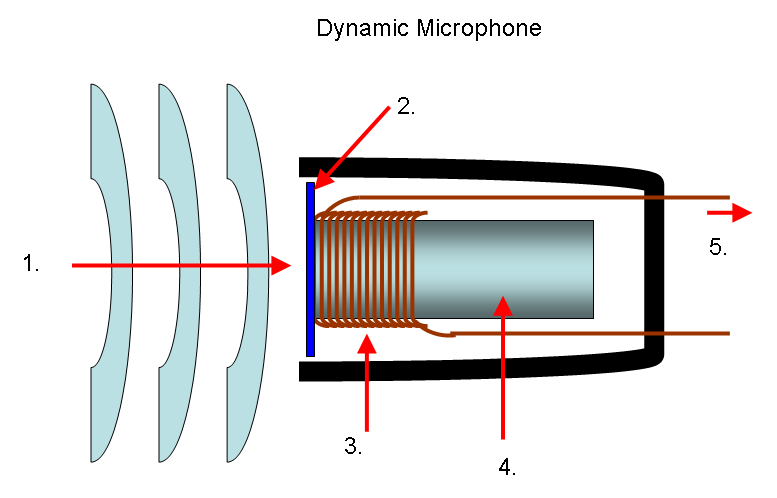
1. Sound waves 2. Diaphragm 3. Coil 4. Magnet 5. Wire to sound card.
The microphone contains a vibration sensitive membrane connected to a coil within/around a magnetic. When a sound hits the microphone membrane, it causes the the coil to move in and out of the magnet. This disturbs the magnetic fields within the coil and causes a current to pass along the cable from the microphone to the sound card.
The voltage produced will vary, depending on how fast the magnetic moves within the coil, and the current flow will alternate it’s direction, depending on whether the magnetic is moving inwards or outwards.
The sound card’s job is to act as a highly sensitive and accurate voltmeter, recording the voltage every set time period (the sampling rate). These measurements are passed to the computer software that is used to save the recorded voltages.
Microphone Demo Animation video (YouTube)
Converting to binary
Converting the audio wave to binary format
Now we have the voltage for each measurement, all we need to do in order to store the data in binary is simply store a stream of binary numbers. At the start of the file we record the sampling rate, and then the rest of the audio file contains a stream of binary numbers, each of which correspond to the voltage at a given time.
Negative numbers in binary
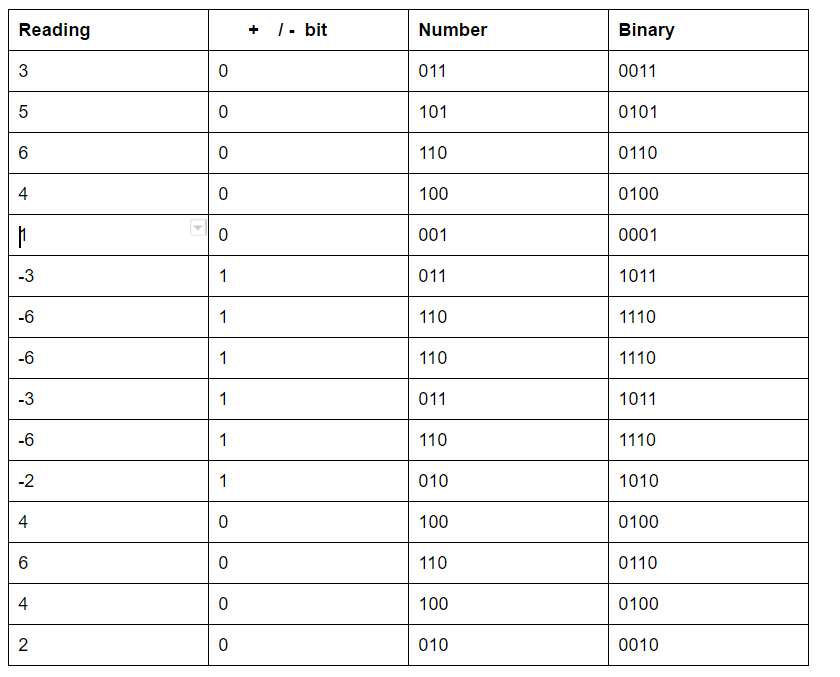
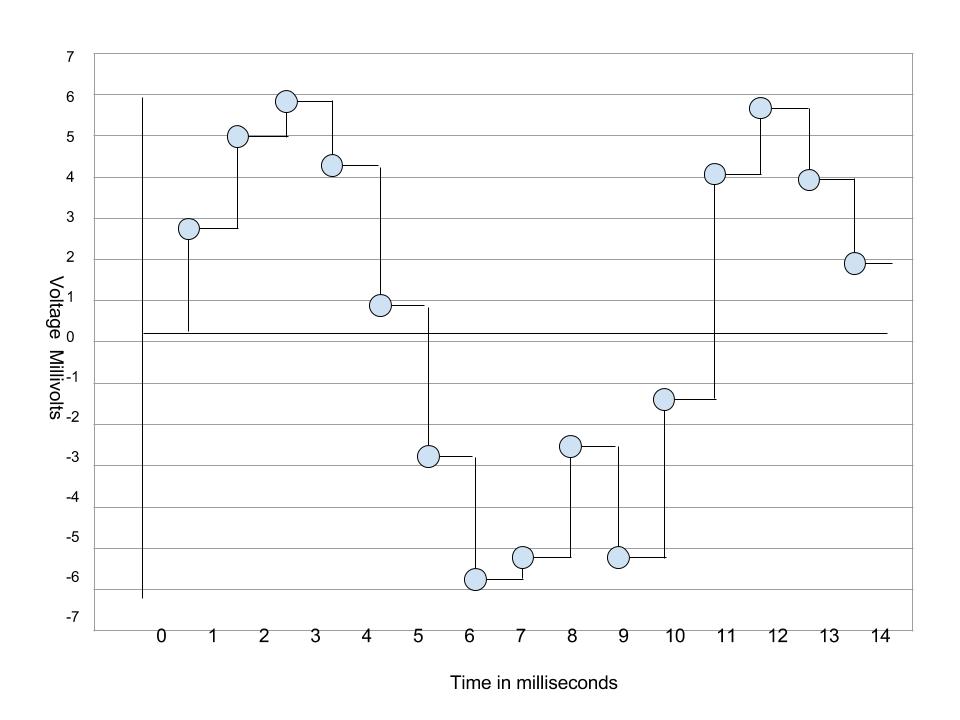
As you can see by the waves below, we are now going to need to record positive and negative numbers in binary. For the sake of this simple example, we are going to cheat and simply add an extra bit at the start of the binary to indicate positive or negative ( 0 for positive, 1 for negative). In reality computer systems use a slightly more complicated version for writing negative numbers, known as two’s compliment, because it allows computers to perform binary addition more efficiently than our simple system and is more efficient, but we won’t be covering in this lesson.
Example Sound Wave
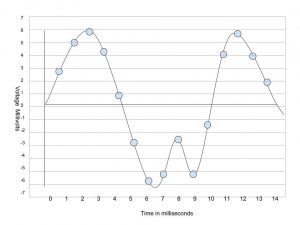
Sampled voltage readings
Click to enlarge
Final example output
The final binary file sound file would look like:
sample rate (1 sample per millisecond) + binary sound wave data
0001 0011 0101 0110 0100 0001 1011 1110 1110 1011 1110 1010 0100 0110 0100 0010
Important Note
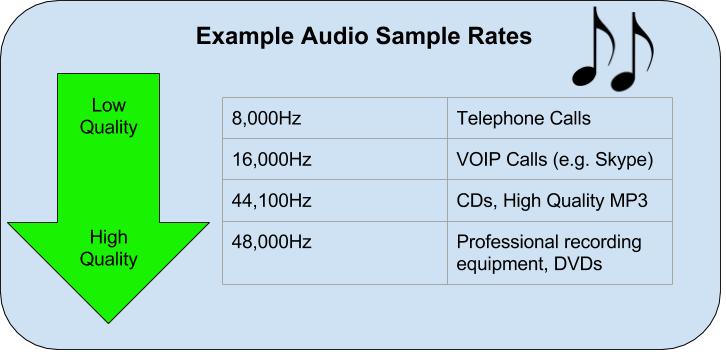
Please note that the data above is far more simple than an actual sound file. Sound files usually have a sample rate of about 44,100 samples per second (44.1 samples per millisecond) and the voltage differences are recorded far more accurately, but you can see how the whole process works in principle!
Audio Quality
Digital to Audio Conversion
When you record sound, you are converting the original analogue signal to a digital (binary) format. Through this process you lose some of the sound quality.
As can be seen below, the digital wave that is recorded is different to the original analogue sound wave, because you are only sampling the wave a certain number of times per second. If you want to increase the quality of the recorded audio, you need to increase the sample rate.
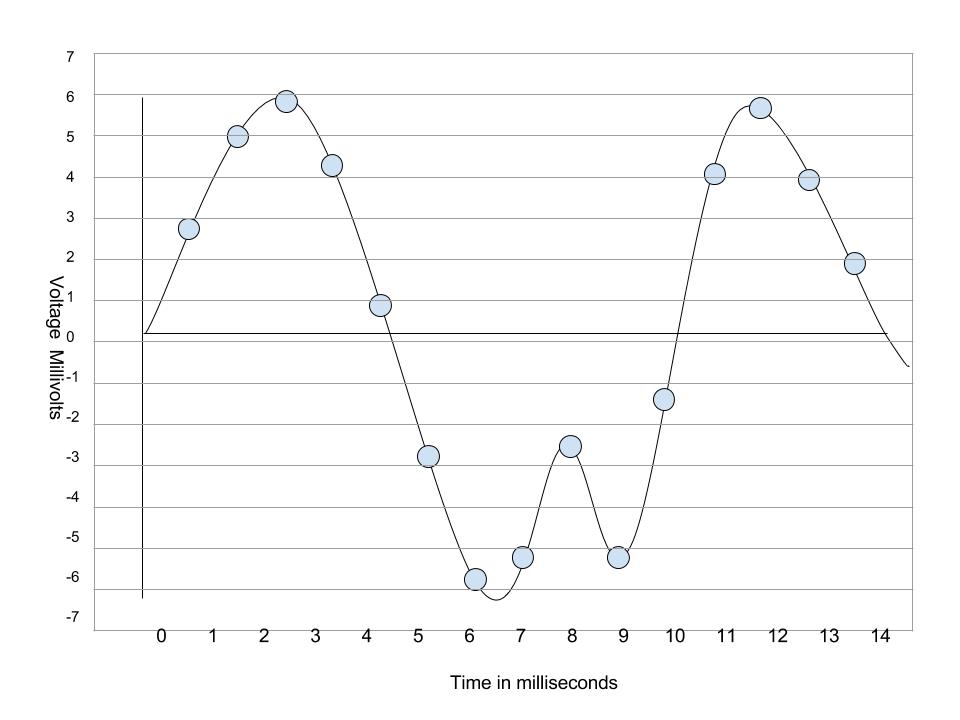
Original Analogue Sound Wave
Stored Digital Sound Wave
YouTube video sample rate comparisons
Resources
Resources
Starter
https://play.kahoot.it/#/k/fc7843cb-b752-45be-9a17-9d3a107fcefb
Activity – Converting audio to digital and back again.
Step 1
Using the graph paper in the link, draw a sound wave of you choice on the graph paper.
Step 2
Once you have drawn the sound wave, take the sample voltages at each point and record them on the sample values table sheet.
Step 3
Swap your table of values with a friend and plot each other’s audio waves using their values.
Step 4
Compare your original sound wave with your friend’s plotted wave – how close are they?
Worksheet Link